Passport Size Photo Maker

100% secure, free, and easy to use.

100% Browser-Based Local Processing

Upload Photo

Privacy Focused

🔒 Local Processing. Your data never leaves your device.

Instant Results

🌐 Fully Client-Side. Runs instantly in your browser.

No Signup

⚡ No accounts. No hassle. Just open and use.

Browser Based

🚀 Works right in your browser. No installs, no downloads.

Overview

This tool crops and formats a photo to passport, visa, or ID specs in your browser. Pick a country preset (US 2x2", UK/India 35x45mm, Canada 50x70mm) or a custom size and DPI, set a background colour, adjust brightness, and download a single photo or a print-ready PDF sheet of multiple copies.

Getting an ID photo to the right size and layout is fiddly. This maker handles it: choose the format your document needs, position your face in the crop frame, tidy up the lighting, and download either a single correctly-sized image or a sheet with several copies ready to print at a photo lab or at home.

Everything runs in your browser, so your photo is never uploaded — which matters for a biometric image. A quick, honest note: the tool gets the dimensions and resolution right, but whether a photo is accepted also depends on your pose, expression, lighting, and background following the official rules, so check your authority's guidelines too.
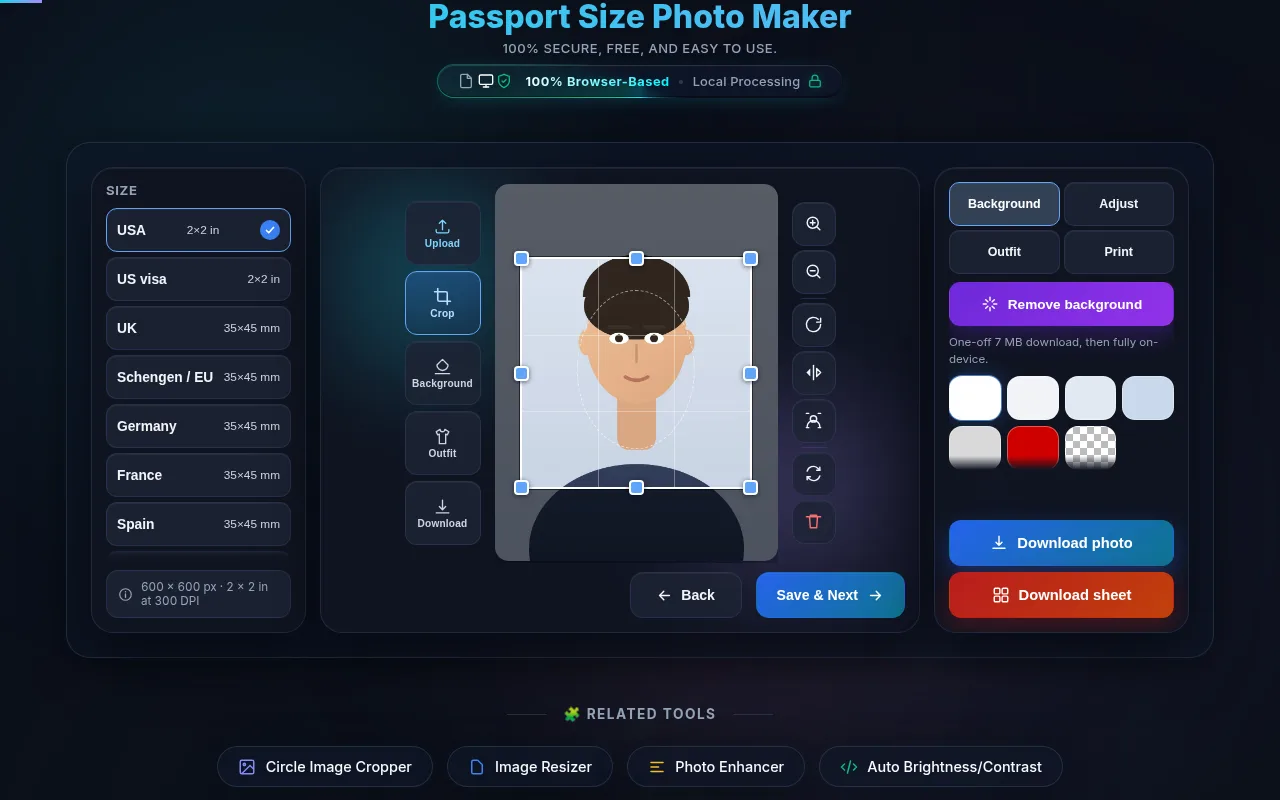
Passport photo crop overlay with country size presets and background colours.
Country presets and a crop overlay for head positioning.

How to use it

Step 1: Upload your photo — drag in or click Upload Image (JPG or PNG)

Upload your photo — drag in or click Upload Image (JPG or PNG). A plain, evenly-lit background works best.

Step 2: Choose the size — pick a preset (US 2x2", UK/India 35x45mm, Canada 50x70mm) or enter a custom width, height, unit, and DPI (300 is standard for print)

Choose the size — pick a preset (US 2x2", UK/India 35x45mm, Canada 50x70mm) or enter a custom width, height, unit, and DPI (300 is standard for print).

Step 3: Position and adjust — zoom and move your face within the crop overlay so your head fills roughly 70–80% of the frame, choose a background colour, and fine-tune brightness, contrast, and saturation

Position and adjust — zoom and move your face within the crop overlay so your head fills roughly 70–80% of the frame, choose a background colour, and fine-tune brightness, contrast, and saturation.

Step 4: Download — save a single photo, or set the sheet size (4x6, 5x7, 6x8, A4) and number of copies and download a print-ready PDF

Download — save a single photo, or set the sheet size (4x6, 5x7, 6x8, A4) and number of copies and download a print-ready PDF.

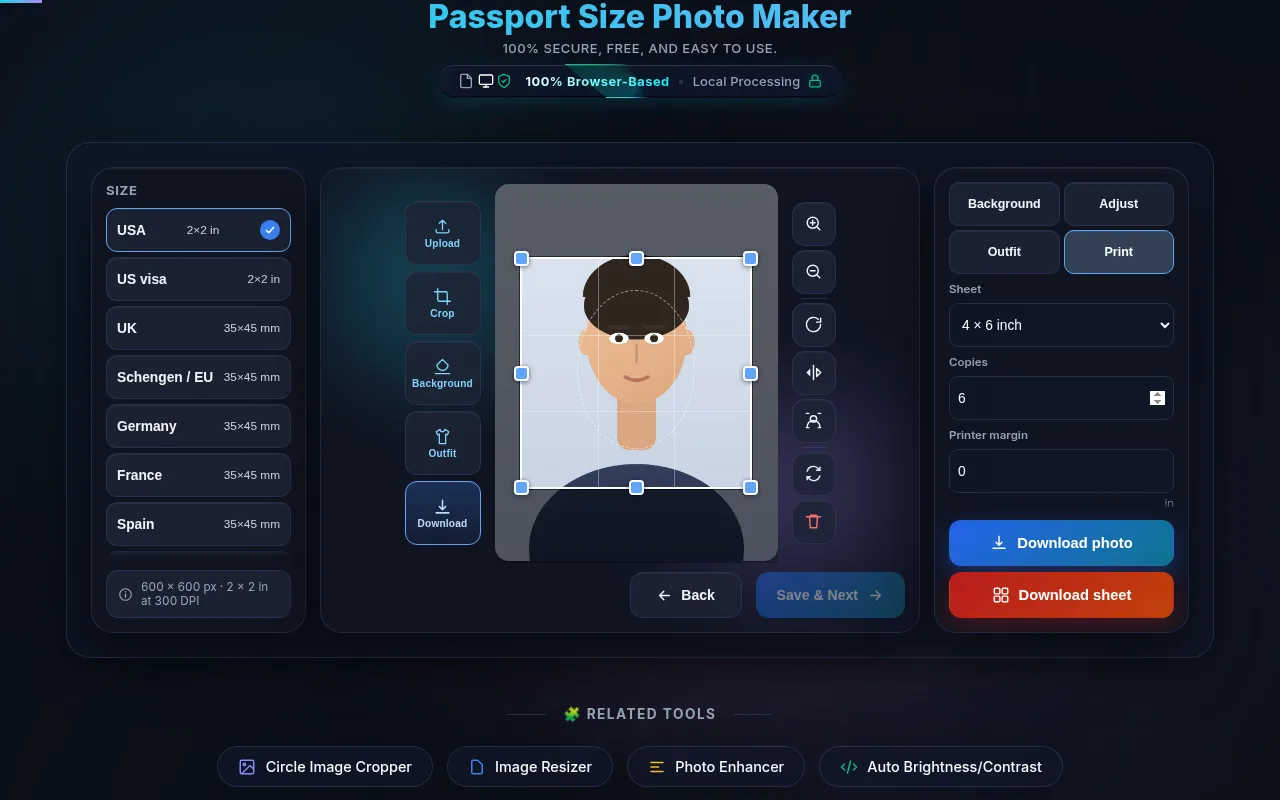
Print sheet options: 4x6 inch paper, six copies and a printer margin, ready to export as a PDF.
Print several copies on one 4x6 or A4 sheet.
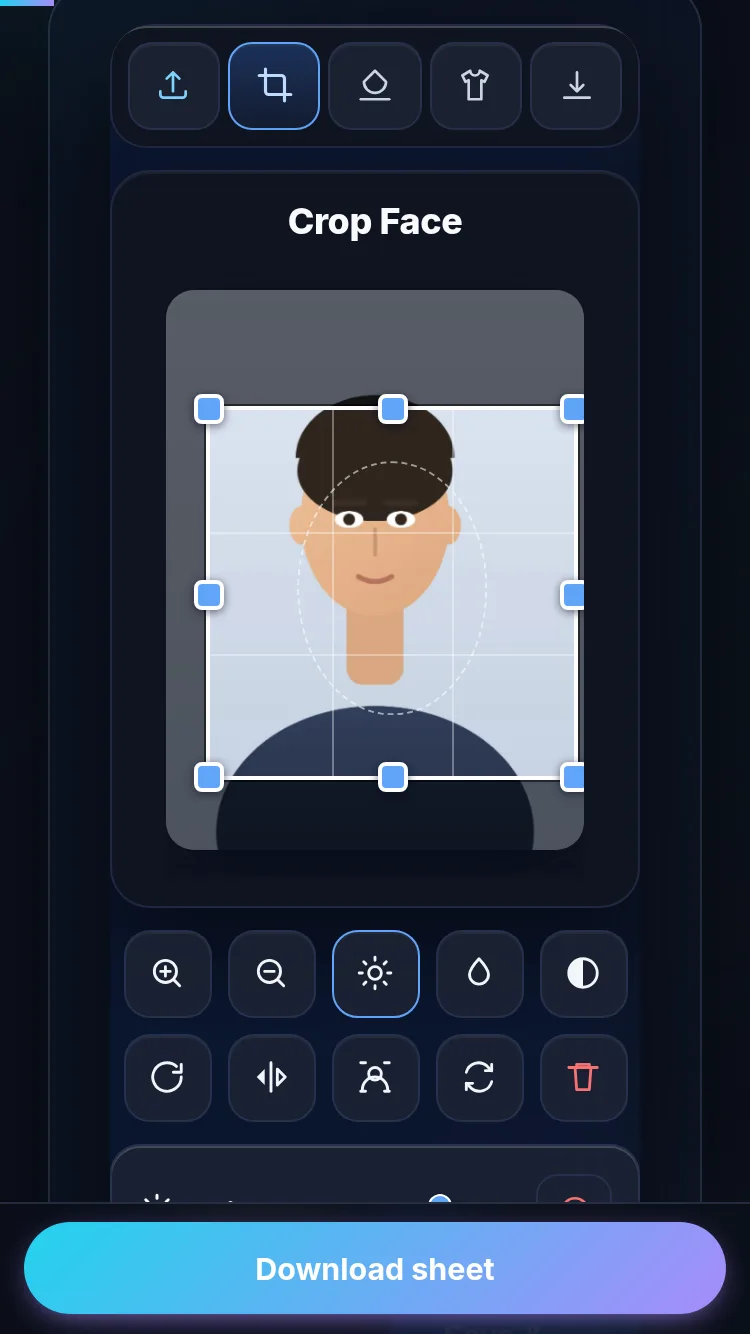
Making a passport photo on a phone with touch controls.
Works on mobile — no app.

Passport photo sizes by country

There are not two hundred passport photo sizes in the world — there are about ten. Most countries follow the ICAO Doc 9303 baseline of 35 × 45 mm, and the United States is the main holdout with its 2 × 2 inch square. Everything below is a preset in the tool, so you can pick the row rather than type the numbers.

Every size this tool offers, and the pixel dimensions it exports at 300 DPI.
Photo sizePixels at 300 DPIUsed for
2 × 2 in (51 × 51 mm)600 × 600USA passport, US visa, Philippines
35 × 45 mm413 × 531UK, Schengen & EU, India, Australia, New Zealand, Japan, Mexico, South Korea, Thailand, Singapore, Taiwan, Nigeria
50 × 70 mm591 × 827Canada, Brazil
40 × 50 mm472 × 591Hong Kong
51 × 51 mm602 × 602Indonesia
40 × 60 mm472 × 709Vietnam
35 × 50 mm413 × 591Malaysia
50 × 60 mm591 × 709Turkey
33 × 48 mm390 × 567China
630 × 810 px630 × 810India online (Passport Seva upload)

Two things this table hides

A country can want one size for a passport and a different one for a visa. Indonesia is the clearest case: the immigration office asks for the 51 × 51 mm square with a red background for a passport, while an Indonesian visa uses the ordinary 35 × 45 mm on white. Brazil does the same thing in reverse — 50 × 70 mm for the passport from the Polícia Federal, 35 × 45 mm for a visa. Check which document you are applying for, not just which country.

The other thing is that India changed. Since 1 September 2025 an Indian passport photo is 35 × 45 mm under the ICAO standard, and the older 2 × 2 inch square is no longer accepted. If you made an Indian passport photo before then, it is the wrong shape now.

How much of the frame your head should fill

Size is the easy half. The half that gets photos rejected is head height — the distance from the bottom of your chin to the top of your head, including hair. Authorities publish it in millimetres, and it is a range rather than a target, so there is room to be slightly off without failing.

Published chin-to-crown ranges. The tool measures against these and tells you where you are.
AuthorityPhoto sizeHead heightShare of frame
United States2 × 2 in25–35 mm (1–1⅜ in)50–69%
United Kingdom35 × 45 mm29–34 mm64–76%
Schengen & EU35 × 45 mm32–36 mm71–80%
Canada50 × 70 mm31–36 mm44–51%
Australia35 × 45 mm32–36 mm71–80%
New Zealand35 × 45 mm31–36 mm69–80%
Hong Kong40 × 50 mm32–36 mm64–72%

Notice how different the last column is. A Canadian photo is a much looser crop than a Schengen one — the same head fills half a Canadian frame and four-fifths of a European one. This is why cropping a photo you already made for one country almost never works for another, and why the tool re-frames rather than just resizing.

The United States is the only authority in this list that also publishes an eye-line rule: your eyes should sit between 1⅛ and 1⅜ inches from the bottom edge. Everyone else leaves vertical position to the head-height rule alone.

When we do not show a verdict

Most of the countries in the size table above do not publish a head-height range we could verify at the issuing authority. For those the tool still measures your crop and shows you the number, but it does not pass or fail you, because a confident wrong answer on a biometric photo is worse than no answer. If your authority publishes a figure, compare it against what the tool reports.

A digital upload and a printed photo are not the same job

These two have almost nothing in common, and mixing them up is one of the most common reasons an application stalls. A printed photo is specified in millimetres and needs enough resolution to survive printing. A digital upload is specified in pixels and often in kilobytes as well, and physical size is meaningless to it.

For printing

Work in millimetres or inches at 300 DPI. DPI is simply how many pixels get packed into each printed inch — at 300 DPI a 2 × 2 inch photo is 600 × 600 pixels, and a 35 × 45 mm one is 413 × 531. Below about 300 DPI, printed skin starts to look soft and the photo can be refused for poor quality. Above it you gain nothing you can see.

For uploading

Portals ask for exact pixels. India's Passport Seva wants a JPEG of exactly 630 × 810 pixels weighing between 10 and 250 KB — there is a preset for that size in the tool. The US State Department wants at least 600 × 600 pixels for its online application. Because a digital file has no physical size, a photo that is correct for an upload may be useless for printing and the other way round, so make each one for its own purpose.

This tool handles both halves of that. Set File type to JPEG, tick Fit to target size, and type the ceiling your portal states — the export then searches for the highest image quality that still lands under it, and tells you what the file actually weighs before you download. Choosing the India online (630 × 810 px) preset sets this up for you at 250 KB, and warns you if the result falls under the 10 KB floor. Leave the file type on PNG when you are printing, where nothing weighs the file and you want no quality loss at all.

Why passport photos get rejected

Rejections cluster around a small number of causes, and most of them happen when the photo is taken rather than when it is cropped. Reading this list before you shoot is worth more than any amount of editing afterwards.

  • The head is the wrong size in the frame. Far and away the most common failure, and the one the crop overlay exists to prevent. Too small is more common than too large, because people frame a passport photo like a normal portrait.
  • The expression is not neutral. Mouth closed, no smile, both eyes open and looking straight at the lens. A slight smile that would be fine in a portrait is a rejection here.
  • Shadows. Either across the face or cast onto the wall behind. A shadow behind your head is read as a non-uniform background, which fails even when the wall itself is white.
  • Glasses. The United States has banned them outright since 2016, and many other authorities now do the same. If your authority still allows them, the frames must not touch your eyes and there must be no glare.
  • Hair across the face. The full face from the bottom of the chin to the top of the forehead needs to be visible, and both edges of the face must be clear.
  • The background is the wrong colour or is not plain. Patterned wallpaper, a door frame, another person's shoulder — all fail. So does a background that is technically white but unevenly lit.
  • The photo is too old. Almost every authority wants one taken within the last six months, and will compare it with your previous document.
  • Low resolution or an upscaled image. Enlarging a small photo does not add detail, it adds blur. Start from the largest original you have rather than a copy sent through a messaging app.
  • Retouching and filters. Beauty filters, skin smoothing and background replacement done badly are all grounds for refusal. Adjusting overall brightness is fine; changing your face is not.
  • Head coverings. Generally not allowed unless worn daily for religious reasons, and even then the full face from the bottom of the chin to the top of the forehead must be visible.
  • Printed badly. A correct photo printed on plain office paper will be rejected. Photo paper, no visible pixels, no ink banding.
  • The digital file is the wrong weight. Portals that specify a kilobyte range enforce it, and a file that is one kilobyte over will simply not upload. Export as JPEG with Fit to target size ticked and the tool lands the file inside the range for you.

An honest note on what this tool can and cannot do about that list. It can fix the size, the crop, the head position, the background colour and the print layout. It cannot fix your expression, your lighting, your glasses or the age of the photo — those decisions are made before you upload anything here.

Background, lighting and what to wear

Background

Plain white is the safest default and is what most authorities ask for, though some accept off-white or light grey, and Indonesia asks for red on a passport photo. The colour matters less than the evenness: a wall that is white in the middle and grey at the edges fails, and so does one with a visible shadow behind your head. Stand a good arm's length away from the wall rather than against it, which is what stops the shadow.

The tool sets a background colour, and if you have removed the background first it applies cleanly to the whole frame. Starting from a plain wall still gives a better result than relying on a cut-out, because hair edges are where automatic separation is weakest.

Lighting

Face a window during the day and put nothing bright behind you. Soft, even, front-on light with no single strong source is what you are aiming for — no overhead lamp casting shadows into your eye sockets, no side lamp lighting half your face. Turn the flash off; direct flash produces both glare and a hard shadow on the wall behind.

Clothing

Wear something that contrasts with the background — a white shirt on a white wall leaves you with no visible shoulder line, which some reviewers treat as a failure. Avoid uniforms, and avoid anything with a high collar that covers the jaw. Everyday clothes are correct; there is no requirement to dress formally.

The outfit overlays in this tool are a convenience for ID cards, profile pictures and informal use. They are not a way to satisfy a passport office, which expects the clothes you actually wore.

Printing at home or at a lab

The print sheet in this tool tiles several copies of your photo onto a standard paper size and exports it as a PDF at 300 DPI. You choose 4 × 6, 5 × 7, 6 × 8 inch or A4, and how many copies you want.

The one setting that ruins prints

Print at 100% scale, not "fit to page". Fit to page silently resizes the sheet by a few percent to match your printer's margins, and a passport photo that is 3% too small is out of specification even though it looks fine. In most print dialogues the setting is called Actual Size, 100%, or None under Page Scaling.

At home

Use photo paper, not plain paper — this is the single biggest quality difference and a plain-paper print is usually refused on sight. Matte and glossy are both normally accepted; matte is more forgiving of fingerprints. If you are printing on A4, the tool adds a small printer margin by default, because most office printers cannot reach the edge of the sheet and the outer photos would otherwise be clipped.

At a lab or kiosk

Take the 4 × 6 sheet. Every photo lab and supermarket kiosk prints that size as a standard borderless photo print for very little, and you cut the copies out yourself. Ask for no auto-correction or auto-crop if the option exists, since both will alter the framing you just set.

Cut just inside the guide lines with a craft knife and a steel ruler rather than scissors. A slightly crooked cut is a surprisingly common reason for a photo being handed back.

Photos of babies and young children

Infant photos are the hardest ones to get accepted, and the rules are genuinely different rather than just relaxed. Most authorities drop the neutral-expression requirement for babies, and several accept a photo where a newborn's eyes are closed — the United Kingdom and Australia both do. The size and background rules do not change.

The practical method

Lay the baby on their back on a plain white sheet and photograph from directly above. This removes the two problems at once: it supports the head without anyone holding it, and the sheet becomes a perfectly even background. Shoot in daylight near a window, and make sure no shadow of you or the camera falls across the child.

Nobody else may appear in the frame, including a hand supporting the head, a car-seat strap, a dummy or a toy. For a slightly older child who can sit up, a plain wall and a parent standing behind the camera to hold attention works better than trying to pose them.

Because a baby's head is proportionally much larger, it is easy to overshoot the head-height range. Crop wider than feels natural and check the measurement rather than trusting your eye.

Frequently Asked Questions

What size is a US, India, or UK passport photo?

The US uses a 2 x 2 inch (51 x 51 mm) square photo. The UK and India both use 35 x 45 mm — India moved to the 35 x 45 mm ICAO standard in September 2025, so the older 2 x 2 inch square is no longer accepted for an Indian passport. Canada uses 50 x 70 mm. This tool has presets for all three, and a Custom option for any other size. For the US, official guidance puts the head roughly 1 to 1.375 inches from chin to crown, which the crop overlay helps you frame.

Is it safe to use my personal photo here?

Yes. The tool runs entirely in your browser using client-side processing, so your photo is never uploaded to a server — important for a biometric image. Nothing is stored once you close the tab. For extra privacy before submitting a photo online, you can strip GPS and camera data from it first with the Image Metadata Viewer.

Will my photo definitely be accepted by the passport office?

The tool gets the size, crop, and resolution right, which removes a common reason for rejection. But acceptance also depends on things it can't judge — your expression, head position, even lighting, and a plain background, all following your authority's rules. Treat this as a formatting tool, and check the official photo guidelines to be sure your shot complies.

How do I print passport photos at home?

Use the "Download Print Sheet" option. It tiles several copies of your photo onto a standard sheet (4x6, 5x7, 6x8, or A4) and exports a 300-DPI PDF, so you can print a strip on photo paper at home or at a print kiosk without wasting space. Choose how many copies you want before downloading.

Can I change the background colour?

Yes — there are White, Light Blue, Red, and Transparent options for the backdrop. For a clean colour result, it's best to start from a photo taken against a plain, evenly-lit wall, since the swatch sets the background colour rather than performing a complex cut-out. White is the most commonly required colour for passports and visas.

Can I set a custom size for another country?

Yes. Choose "Custom Size" and enter the exact width and height in inches, millimetres, or pixels, plus the DPI. This covers countries and documents not in the presets — Schengen visas, specific national ID cards, or any unusual requirement — so you can match whatever dimensions your form specifies.

What is DPI and why does it matter?

DPI (dots per inch) sets how many pixels are packed into each printed inch. Photo prints need 300 DPI to look sharp, which is why the print sheet is generated at 300 DPI. If the DPI is too low, a printed photo can look soft or pixelated, so keep it at 300 for any photo you intend to print.

How big should my head be in the frame?

For most passport and visa photos, your head (chin to the top of your hair) should fill roughly 70–80% of the frame and be centred. Use the zoom slider and drag to position your face within the crop overlay until it sits in that range. Getting the head size right is one of the most common requirements.

Can I adjust the brightness of my photo?

Yes. There are Brightness, Contrast, and Saturation sliders to correct a photo that's a little dark, flat, or washed out. Passport photos usually need even, natural lighting, so small adjustments can help — but avoid heavy edits that change your appearance, as that can cause a rejection.

What file formats can I use and download?

You can upload JPG or PNG, and download a single high-quality image or a print-sheet PDF. If a specific government portal requires a JPEG and you've downloaded a PNG, convert it with the PNG to JPG tool. If the file is too large for an upload limit, shrink it with the Image Compressor.

Can I make several copies on one sheet?

Yes. In the Download Sheet section, choose your print sheet size and set the Number of Photos, and the tool arranges that many copies of your photo on the page as a PDF. This is the most economical way to print — you get a full strip of identical photos from a single sheet of photo paper.

Does it work on a phone?

Yes. The maker has a mobile layout with pinch-to-zoom and touch controls, plus separate buttons to download the single image or the PDF sheet, so you can crop and format an ID photo on Android or iOS. Nothing is installed — it runs in the phone's browser.

Can I wear glasses in a passport photo?

Usually not. The United States has banned glasses in passport photos since November 2016, and many other authorities have followed. Where they are still permitted, the frames must not cover any part of your eyes, there must be no glare on the lenses, and tinted lenses are not accepted. If you wear glasses daily it is simpler to take them off for the photo than to argue the point at the counter.

Can I smile in a passport photo?

No. Every authority asks for a neutral expression with your mouth closed and both eyes open, looking straight at the camera. A slight smile that would look fine in an ordinary portrait is a common reason for rejection, because it changes the shape of your face and interferes with the facial recognition the document is checked against.

How recent does my passport photo need to be?

Almost every authority asks for a photo taken within the last six months, and will compare it against your previous document. Cropping an older photo to the right size does not make it recent — if your appearance has changed noticeably, take a new one. This tool changes the framing of a photo, never its date.

Can I use a selfie for a passport photo?

It is better to have someone else take it. A phone held at arm's length is too close, which enlarges your nose and distorts the proportions the biometric check relies on. If you have no choice, prop the phone at eye level about a metre away, use the rear camera and a timer, and stand a good arm's length in front of a plain wall so you do not cast a shadow on it.

What size is a passport photo in pixels?

It depends on whether you are printing or uploading. For printing at 300 DPI, a 2 x 2 inch photo is 600 x 600 pixels and a 35 x 45 mm one is 413 x 531. For an online application the portal usually states an exact pixel size instead — India's Passport Seva wants 630 x 810 pixels, and the US State Department wants at least 600 x 600. The tool shows the exact pixel output for whichever preset or custom size you pick.

How do I take a passport photo of a baby?

Lay the baby on their back on a plain white sheet and photograph from directly above. That supports the head without anyone holding it and gives a perfectly even background at the same time. Most authorities drop the neutral-expression rule for infants, and several — including the UK and Australia — accept a newborn with their eyes closed. Nobody else may appear in the frame, including a supporting hand, a strap or a dummy.

Still have questions?

If you can't find the answer you're looking for, feel free to contact our support team.

Contact Us